Okay, so today is all about the stuff I wish somebody had said to me when I started machine quilting. My mentor has her quilts long armed and because I didn’t come from a sewing background, I didn’t know anything. And, I made some really big messes.
And, you should, too. Because making really big messes is a great way to learn. Just be okay with it and move on.
Some of this might sound really basic, but it’s my secrets to success. There’s been a ton of stuff written about free motion quilting, but details about straight line quilting seem to be hard to find…at least for me, so here is what I’ve learned from trial and error. And, most of it applies to both straight line and free motion.
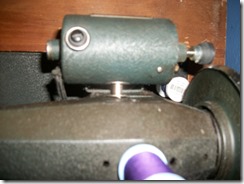
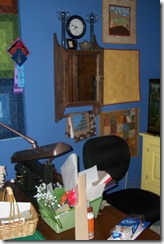
First thing is machine setup. This is how my Bernina quilting machine is set up.
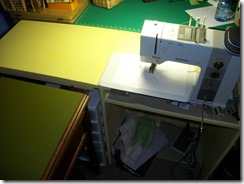
The machine is set down in a cabinet (custom made by my honey-doer in his woodshop). Behind the machine is a table that the quilt can rest on after it gets through the machine’s throat plate. Gravity is not a quilters friend. Gravity will pull the quilt down and you don’t want to be wrestling with a quilt to quilt it. Keep the quilt on a level surface the whole time. To the left of my chair is a sewing machine cabinet that is the same height as my sewing surface. It holds the weight of the quilt before it goes through the needle plate. The quilt kind of snakes from that cabinet top, onto my lap, and then under the needle. My lap is only about 5 inches below the sewing surface so that, with my back straight, my elbows are level with the sewing surface.
It would be very hard for me to quilt on the small surface of my machine bed.
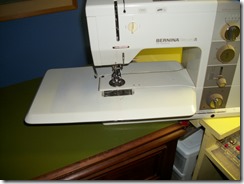
Again, the quilt would hang off the sides and I’d be wrestling. So, when I’m not in my perfect space, I have a surround (also built by my Honey). It gives me the surface to the left and the surface behind the machine.
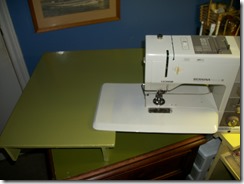
My focus is on moving the weight and volume of the quilt through the machine. The quilt will pull in directions I don't want it to go. Learning to manage that was key to learning machine quilting. If I’m moving along and suddenly the quilt doesn’t want to move, don’t push (do as I say, not as I do…this is still hard for me, but it is almost always a mistake to push the quilt). Stop and figure out what it’s caught on. Usually, it’s because the quilt is hanging over the front of the machine bed and into your lap at a 90* angle. Straighten that out a bit and it will glide on through.
When I straight line quilt, I usually don't do any stabilizing, unless it goes with the overall quilting plan and I’m going to leave it in. There’s too much danger that I’ll catch one of those stabilizing threads with a quilting thread and break the quilting thread when I try to pull it out. Or, I’ll get a pucker. I do thread baste quilts into sections sometimes when I machine quilt. I do this for stability, and to break it into easy pieces. But, only if I won’t be crossing that stabilizing thread with a quilting thread.
The walking foot should have come with an adjustable seam guide. (basic, I know, but I don’t come from a sewing background, so I had to stumble up on how to use this.) When you use it, be sure that the tightening screw is tight. You can nudge that while you work and before you know it, you’re quilting a whole new line.
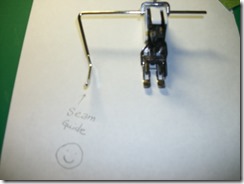
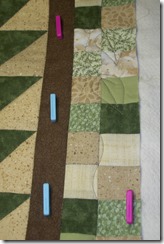
Set that so that the seam guide runs along a seam edge from the piecing of the quilt. In this picture, the piecing is in black and the quilting in red.
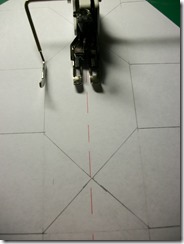
I never measure one line of quilting from another line of quilting. There lie crooked lines. If I get a little bit off and measure from that, the next time, I’ll be a little more off and the next time a little more. If I use a piecing line to measure the quilting line, at least the quilting will be parallel with the piecing and you won’t be able to see that it’s not straight.
I still practice before I put a stitch in my quilt top. I take two pieces of fabric, about 36 to 45 inches square and sandwich them with a batting. (Later, if you want, you can finish it and bind it and it can be a baby quilt.) This helps me get ready for the weight and volume I’ll be working with and how that fits into the machine throat. And, it gives me a place to practice a new design if I’m FMQ. It all ends up being muscle memory after you do it for a while, but better to remind my muscles of what I want before I’m working on something I spent a year piecing.
For practice, You could mark one line diagonally down the center of this sandwich, from corner to corner, and practice straight line quilting and using the seam guide (measure from a previous line of quilting or keep marking more lines).
I always start straight line quilting with a line that runs edge to edge, or corner to corner and divides the quilt in half. That means that half of the quilt is going to pass through the throat of the machine. The easiest way to do that is to start on one edge or at one corner and roll it into a log, toward the center line. Don't get crazy about the log. It's just to make the quilt small enough to go through the throat and organized enough to keep it from catching on something.
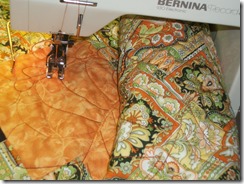
I use my hands to flatten out a place about the size of a luncheon plate around the needle. In hand quilting, this would be the space that is in the quilting hoop. My hands are replacing the hoop to keep the quilt flat and taut as it passes under the needle. This helps prevent puckers in the quilt back. I put my right forearm against the log and push it a bit to the right, against the sewing machine riser, so that it doesn't get in the way of my hands. The log will get smaller and smaller as I quilt outward from center and more and more of the quilt will be on the left side of the needle.
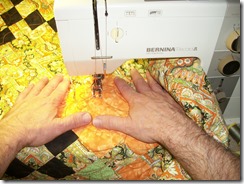
Quilt one long straight line and then I snip my thread. At this point, the quilt has gone from my lap to the back side of the machine. Next, I pull it all back into my lap and quilt the second diagonal line. I don't turn the quilt or change direction. This makes puckers and wrinkles. I work in rows to the right until I get to the edge, one row at a time.
After all the lines to the right of center are in, roll the other half of the quilt toward the center and quilt all the lines on the other side of the center.
Now, if you want to get really crazy with it, you can quilt lines in the opposite direction, but if you do, be VERY careful that your hands keep the quilt taut as it passes under the needle or you’ll get a pucker in the back where the backing fabric pushes against a previous line of quilting and then folds over it. One direction is generally enough to hold the quilt together.
I almost never use contrasting thread. I pick something that's going to be a nice neutral. Maybe a light blue or a light brown or even into the mediums, depending on how dark the quilt top is. But, straight line quilting is about the quilting supporting the piecing, not about the quilting making a statement of its own.
I started out using invisible monofilament so my mistakes wouldn’t show, but if you do, try to use the one that's not shiny. Invisible monofilament comes in a shiny and a not shiny. I don't like the shiny because it reflects light more. The not shiny recedes into the quilt and all but disappears.
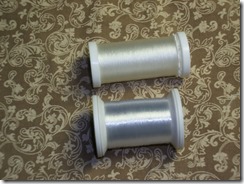
The one on bottom is the shiny. See the difference?
Okay, so maybe I do know one or two things. Anybody have any tips to add?
Lane


